Australia’s involvement in the First World War began when Britain and Germany went to war on 4 August 1914, and both Prime Minister Joseph Cook and Opposition Leader Andrew Fisher, who were in the midst of an election campaign, pledged full support for Britain. The outbreak of war was greeted in Australia, as in many other places, with great enthusiasm.
The first significant Australian action of the war was the Australian Naval and Military Expeditionary Force’s (ANMEF) landing on Rabaul on 11 September 1914. The ANMEF took possession of German New Guinea at Toma on 17 September 1914 and of the neighbouring islands of the Bismarck Archipelago in October 1914. On 9 November 1914 the Royal Australian Navy made a major contribution when HMAS Sydney destroyed the German raider SMS Emden.
On 25 April 1915 members of the Australian Imperial Force (AIF) landed on Gallipoli in Turkey with troops from New Zealand, Britain, and France. This began a campaign that ended with an evacuation of allied troops beginning in December 1915. The next year Australian forces fought campaigns on the Western Front and in the Middle East.
For Australia, the First World War remains the costliest conflict in terms of deaths and casualties. From a population of fewer than five million, 416,809 men enlisted, of whom more than 60,000 were killed and 156,000 wounded, gassed, or taken prisoner.
An Australian digger uses a periscope in a trench captured during the attack on Lone Pine, Gallipoli, 8 August 1915.
After four and a half months of training near Cairo, the Australians departed by ship for the Gallipoli peninsula, along with troops from New Zealand, Britain, and France. On 25 April 1915 the Australians landed at what became known as Anzac Cove, whereupon they established a tenuous foothold on the steep slopes above the beach. During the early days of the campaign the allies tried to break through Turkish lines, while the Turks tried to drive the allied troops off the peninsula. Attempts on both sides ended in failure and the ensuing stalemate continued for the remainder of 1915. In fact, the most successful operation of the campaign was the large-scale evacuation of troops on 19 and 20 December. As a result of a carefully planned deception operation, the Turks were unable to inflict more than a very few casualties on the withdrawing forces.
After Gallipoli the AIF was reorganised and expanded from two to five infantry divisions, all of which were progressively transferred to France, beginning in March 1916. The light horse regiments that had served as additional infantry during the Gallipoli campaign remained in the Middle East. By the time the other AIF divisions arrived in France, the war on the Western Front had long been in a stalemate, with the opposing armies facing each other from trench systems that extended across Belgium and north-east France, all the way from the English Channel to the Swiss border. The development of machine-guns and artillery favoured defensive over offensive operations, and this compounded the impasse that lasted until the final months of the war.
Troops of 53rd Battalion wait to don equipment for the attack at Fromelles, 19 July 1916. Only three of these men survived.
In July 1916 Australian troops were introduced to this type of combat at Fromelles, where they suffered 5,533 casualties in 24 hours. By the end of the year about 40,000 Australians had been killed or wounded on the Western Front. In 1917 a further 76,836 Australians became casualties in battles such Bullecourt, Messines, and the four-month campaign around Ypres known as the battle of Passchendael.
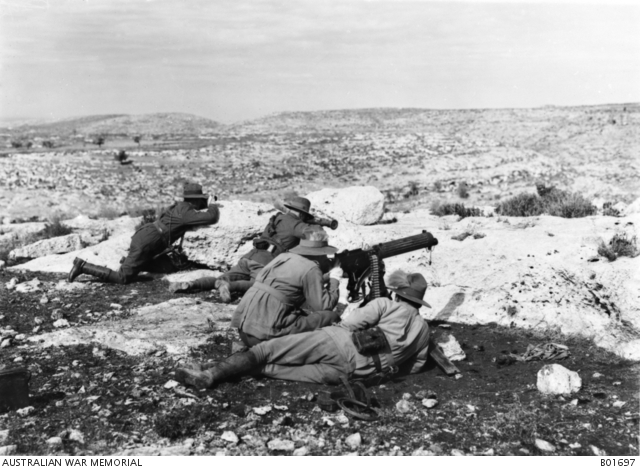
3rd Australian Light Horse Regiment machine-gunners in action at Khurbetha-Ibn-Harith, near Palestine, 31 December 1917
The Australians in the Middle East fought a mobile war against the Ottoman Empire in conditions completely different from the mud and stagnation of the Western Front. Mounted troops of the Australian Light Horse and the Imperial Camel Corps endured extreme heat, harsh terrain, and water shortages, yet casualties were comparatively light, with 1,394 Australians killed or wounded in three years of fighting.
Australian women volunteered for service in auxiliary roles: as cooks, nurses, drivers, interpreters, munitions workers, and farm workers. While the government welcomed the service of nurses into the armed forces, it generally rejected offers from women in other professions to serve overseas. Australian nurses served in Egypt, France, Greece, and India, often in trying conditions or close to the front, where they were exposed to shelling and aerial bombardment as well as outbreaks of disease.
The effects of the war were also felt at home. Families and communities grieved for the loss of so many men, and women increasingly assumed the physical and financial burden of caring for families. Anti-German feeling also emerged with the outbreak of the war, and many Germans living in Australia were sent to internment camps. Censorship and surveillance, regarded by many as an excuse to silence political views that had no effect on the outcome of war, increased as the conflict continued. Social division also grew, reaching a climax in the bitterly contested (and unsuccessful) conscription referendums of 1916 and 1917. When the war ended, thousands of ex–servicemen and servicewomen, many disabled with physical or emotional wounds, had to be re-integrated into a society keen to consign the war to the past and resume normal life.
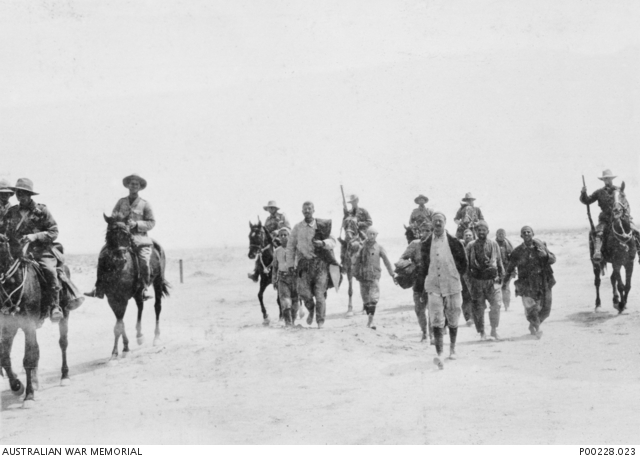
9th Australian Light Horse bring in Turkish prisoners in the Sinai, 13 April 1916
References
C.E.W. Bean, Anzac to Amiens, Penguin Books Australia, New York, 1993.
J. Beaumont, Australia’s war 1914–1918, Allen and Unwin, St Leonards, New South Wales, 1995.
Peter Dennis et al., The Oxford companion to Australian military history, Oxford University Press, Melbourne, 1995.
Source: https://www.awm.gov.au/articles/atwar/first-world-war (accessed 28 June 2019)